Saturday, September 8, 2018

Provide Secure Remote access to on-premises applications using Azure Active Directory Application Proxy

I had the pleasure of attending Azure Active Directory overview class last week.

Learnt some really cool stuff and one of the features that stood out was the Application Proxy. 

Allowing access to internal (on-premise) applications has always involved a lot of moving parts - VPN, DMZ, Firewall Rules, Port numbers, etc. To add to it is the worry of is the application really secure? By allowing access from the internet are we creating a backdoor to the organization? 

Thats where Azure AD Application Proxy comes in picture. A modern way of letting your employees access internal applications. In short remote access as a service.

So I thought lets try this for our Lab vSphere Web client. Would't it be cool if you can access the whole Infrastructure without a VPN or without having a proxy sit in the DMZ and forwarding ports? 

Azure AD application Proxy supports the following applications - 
  • Web applications that use Integrated Windows Authentication for authentication
  • Web applications that use form-based or header-based access
  • Web APIs that you want to expose to rich applications on different devices
  • Applications hosted behind a Remote Desktop Gateway
  • Rich client apps that are integrated with the Active Directory Authentication Library (ADAL)
To find out how the Application Proxy works, please refer to the Microsoft documentation - https://docs.microsoft.com/en-us/azure/active-directory/manage-apps/application-proxy


Ports - You only need 80 and 443 open to outbound traffic.


Now that the prerequisites are taken care of, lets start publishing our application, in this case I am publishing the vSphere Web Client. 

Login to your Azure portal as administrator - portal.azure.com

Select Azure Active Directory > Enterprise applications > New application


Select On-premises application


Next, provide the following information and click Add.


Note: - Make sure you choose Translate URLs in - Application Body to YES if your external name is different than the internal name. 

I had this option set to NO. After publishing the application, I could get to the vSphere login screen but after entering the credentials, it would take me to the internal name (internal URL) and because there is no VPN involved, I could not resolve the internal name and hence would get a DNS error. 

Setting this option to YES would do this - After authentication, when the proxy server passes the application data to the user, Application Proxy scans the application for hardcoded links and replaces them with their respective, published external URLs.

The other way of doing this is to set a custom domain name to match your internal domain. To access your application using a custom domain you must configure a CNAME entry in your DNS provider which points your Internal URL to your external URL.

Example - Your internal URL is https://vcenter_server.contoso.com. Configure a CNAME entry in your DNS which points "vcenter_server.contoso.com" to "vcenter_server.msappproxy.net"

Next select Users and Groups and click Add User and grant the users access.


To add additional security we will enable Conditional Access with Multi-factor Authentication. 

To do this click on Conditional Access and create a new Policy


  • Enter a Name for your Policy 
  • Select the applicable Users
  • Select the newly published app by clicking on Cloud Apps 
  • Conditions - Select Browser and Mobile Apps and Desktop clients & Modern Auth clients.

  • Access Control - Grant - Select Grant Access and check Require MFA
  • Enable the Policy and Save it.
There are two ways to access this published app. 
  1. Go to myapps.microsoft.com and you will see the published app (only visible to the user that was granted access) OR
  2. Just browse to the external URL specified when you created the application.
If you try 2) then you will first be redirected to https://login.microsoftonline.com. Enter your credentials and you will be asked to approve the request on your phone through MFA.

If you have your MFA application setup on the phone, you will get an approval request on the phone, if you dont have MFA setup, it will walk you through the process of setting up MFA by scanning a QR code.

That's all Folks !!

Sunday, August 26, 2018

Curious Case of Network Latency

It all started with a colleague noticing ping response times higher than usual on a RHEL VM. Normal value is considered below 0.5 ms. We were seeing values upto 8-10ms.


We were comparing these values with another VM on the same subnet.

So I tried the basic troubleshooting -

  1. Reboot VM.
  2. Move VM to another Host.
  3. Move VM to same Host as the normal VM.
  4. Remove network adapter and add new adapter and reconfigure the IP.
  5. Use a new IP.
  6. Block port on the Port Group and unblock it.
  7. The network team was involved.
  8. Clear the ARP - this is an internal joke ;-) 
  9. Network team tried to ping from the Nexus 5K. Same response time to this specific VM.
  10. Traced MACs to make sure there are no duplicates, traced vNICs on UCS and vmnics on the ESXi Host.
  11. Decided to contact Cisco, VMware, RHEL, etc.
We often miss the little details and always think its a bigger issue :)

So I decided to start from the little details.

First step was to download the .vmx files for the problem VM and the VM that was responding fine.

Using Notepad++ I did a compare on the VMX files line by line. It was given that there were a lot of differences like - Virtual H/W version, Number of drives, CPU, memory, UUID, etc. but one stood right out at me - CPU Latency Sensitivity


The CPU Latency sensitivity was set to "low" on the problem VM.

Hmmm, why would anyone change the CPU sensitivity settings? And that too to "low" ? If need be it would be set to "high" but not set as low. Obviously whoever changed this (by accident or deliberately) did not know what they were doing.

CPU latency sensitivity was first introduced in vSphere 5.5 with a few caveats. 
  1. Requires to reserve 100% allocated memory
  2. vCPUs are give exclusive access to PCPUs.
  3. Network frames will not be coalesced when enabled.
Read more about this feature here

So back to our problem, how and where do we change this setting? 

There are two ways to do it - Good ol' PowerCli or the vSphere Web client.

Note: You can change the setting while the VM is powered ON but it will take effect on the next reboot.

PowerCli: 

Here is a one liner to find out if other VMs in your environment have these Advanced settings changed - 

Get-VM * | Get-AdvancedSetting -Name sched.cpu.latencysensitivity | ?{$_.Value -eq 'low' -or $_.Value -eq 'High' -or $_.Value -eq 'Medium'} | select Entity, Value | ft -AutoSize

And here is how to change it to desired value.

Get-VM vm_name | Get-AdvancedSetting -Name sched.cpu.latencysensitivity | Set-AdvancedSetting -Value Normal

Note: With PowerCli the settings are changed in the VMX file and will not be visible in the GUI until you reboot the VM. 

vSphere Web Client: 

This setting can be found under "Edit Settings > VM Options > Advanced 


Once these changes were in place and the VM rebooted, the ping response time was back to below 0.5 ms.

Happy days !!

Wednesday, August 22, 2018

VMware VirtualCenter Operational Dashboard

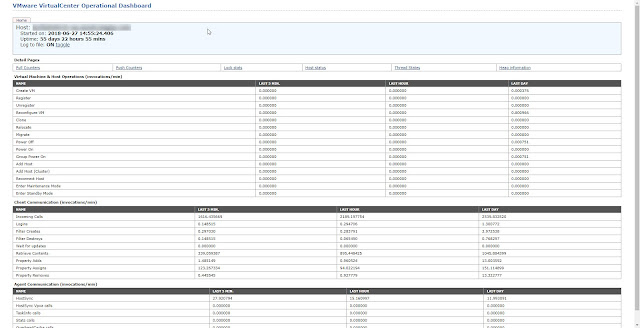
There is a not so popular feature in vCenter that gives you a lot of details and stats. Its called the VMware VirtualCenter Operational Dashboard

Browse to the following URL and replace the vCenter name. This needs authentication. 

  https://vCENTER_SERVER_FQDN/vod/index.html

On the Home page, you can get detailed stats about - 
  • vCenter Uptime
  • Virtual Machine & Host Operations (invocations/min)
  • Client Communication 
  • Agent Communication
There are 6 detail pages available.

Example - If you click on "Host Status" you will get detailed info about Hostname, IPs, MOID, Last heartbeat time etc.


Monday, June 25, 2018

The case of a forgotten Site Recovery Manager (SRM) DB Admin password

While getting ready to upgrade our vCenter from 6.0 to 6.5 and SRM from 6.1.1 to 6.5 we faced an issue were the SRM Embedded DB Admin Password was not documented.

Follow the steps to reset your forgotten password - 

1) You will need to edit the pg_hba.config file under -

C:\ProgramData\VMware\VMware vCenter Site Recovery Manager Embedded Database\data\pg_hba.conf

We had our install on the E:\ drive but the data folder was nowhere to be found. 

So I started searching for the pg_hba.config file and found it under - 

C:\ProgramData\VMware\VMware vCenter Site Recovery Manager Embedded Database\data

2) Make a backup of pg_hba.config

3) Stop service -
       Display Name -  VMware vCenter Site Recovery Manager Embedded Database
       Service Name - vmware-dr-vpostgres

4) Edit pg_hba.config in Wordpad.

5) Locate the following in the file - 

             # TYPE DATABASE USER ADDRESS METHOD
             # IPv4 local connections:
                 host all all 127.0.0.1/32 md5
             # IPv6 local connections:
                 host all all ::1/128 md5

6) Replace md5 with trust so the changes look like the following - 

             # TYPE DATABASE USER ADDRESS METHOD
             # IPv4 local connections:
                 host all all 127.0.0.1/32 trust
             # IPv6 local connections:
                 host all all ::1/128 trust

7) Save the file and start VMware vCenter Site Recovery Manager Embedded Database service.

8) Open command prompt as Administrator and navigate to - 
     E:\ProgramData\VMware\VMware vCenter Site Recovery Manager Embedded Database\bin
  Note: You might have installed in a different drive. 

9) Connect to the postgres database using - 
        psql -U postgres -p 5678 
     This will bring you to a prompt -  postgres=#
     Note: 5678 is the default port. If you chose a different port during installation, replace it                
    accordingly. If unsure open ODBC and check under System DSN.

10) Run the following to change the password - 
       ALTER USER "enter srm db user here" PASSWORD 'new_password';
     Note: srm db user can be found under ODBC - System DSN. new_password should be in single quotes.

11) If the command is successful, you will see the following output - ALTER ROLE


12) Your password has now been reset. Now you can take a backup of the Database.
       Note: You cannot take a backup without resetting the password because it will prompt you for a password 😊

13) To take a backup run the following - 
       pg_dump.exe -Fc --host 127.0.0.1 --port 5678 --username=dbaadmin srm_db > e:\
       destination_location
 

14) Revert the changes made to the pg_hba.config file (Replace trust with md5 or just replace the file you previously backed up.

15) Restart the VMware vCenter Site Recovery Manager Embedded Database service.

16) Go to Add/Remove Programs, select Vmware vCenter Site Recovery Manager and click Change.


17) Be patient it takes a while to load. On the next screen select Modify and click next.

18) Enter PSC address and the username/password.


19) Accept the Certificate

20) Enter information to register the SRM extension

21) Next choose if you want to create a new certificate or to use existing. Mine was still valid so used the existing one.

22) And finally you enter the new password you reset in Step 10. 

23) Once the setup is complete. Make sure the  VMware vCenter Site Recovery Manager Server service started. If not, manually start it. 

Reference: A quick google search brought up the following and we also had a case open with VMware who suggested to follow the same exact blog   http://www.virtuallypeculiar.com/2018/01/resetting-site-recovery-managers.html

Tuesday, May 8, 2018

docker: Error response from daemon: Server error from portlayer

docker: Error response from daemon: Server error from portlayer:

I got this error while running a new container in VIC.


I tried to move the VCH to a different ESXi Host, but no luck.

It is not advisable to reboot the VCH from vCenter, so had to skip that.

Tried to search the internet and came up with a similar error but a different cause - https://github.com/vmware/vic/issues/5782

This did not get me anywhere so I started looking from a higher level and this is what I noticed.


Turned out I had upgraded the VIC from 1.2.1 to 1.3 last weekend and complete forgot to upgrade this last VCH.

As you can see in the image above the VCH I was trying to run a container against was running on 1.2.1. Duh !

So I upgraded the VCH by running the following command -

./vic-machine-linux upgrade --id xxxxxx

And here is the result -


And ta-da I was able to run the new nginx container I was trying to deploy earlier.

Thursday, March 29, 2018

How to find the disk size for an Avamar BMR restore

We had a scenario where a BMR (Bare Metal Restore) system state restore was required.

A skeleton VM was created with drives matching the original server and booted from the Avamar BMR ISO. The restore was kicked off and after 90% the restore failed. Why?

Because the disk sizes did not match. The VM had several disks, some were stripped volumes some as spanned volumes. When the restore skeleton VM was created, the Admins just matched the volumes to the old VM. Avamar has no visiblity of how the disks are laid out within the OS.

Example of how the disks were laid out in VMware and inside the OS - 


So the question is how do you find the disk size if the VM is down and you need a BMR restore?

Avamar has a very nice Avtar command line utility. I could not find an official document from EMC but there is bits and pieces of information on the web.

avtar.exe --help will give you a wide range of options.

Steps to find the drive size for a BMR restore -
  • On your Windows workstation, install the Avamar client software and do not register it with the Avamar console.
  • The default installation path will be - C:\Program Files\avs\
  • Run the following command 
C:\Program Files\avs\bin>avtar.exe -x --server=IP_of_Avamar_Server --id=Username --ap=
Password --path=/clients/servername_FQDN 

--labelnum=label_number_of_the_backup_to_be_restored --internal --target=.\tmp\ .system_info

--target=.\tmp will create a tmp directory under avs\bin and the output of the command will be under this directory.
  • There will be numerous XML files under \tmp.
  • The useful files are CriticalVolumesMapping.xml and partitiontables.xml
CriticalVolumesMapping.xml will give you the details of how the disks are laid out within the OS. 

Example - 
-<VolumeMappings Version="2.0">
<Volume DiskNumbers="0" SubwidIdx="1" DisplayName="c:\" UniqueID="\\?\Volume{6e1e483e-8e40-11e1-a235-806e6f6e6963}\"/>
<Volume DiskNumbers="8,9" SubwidIdx="2" DisplayName="i:\" UniqueID="\\?\Volume{106195a0-5f22-11e4-b3e6-005056bc0037}\"/>
<Volume DiskNumbers="3,5,6,4" SubwidIdx="3" DisplayName="e:\" UniqueID="\\?\Volume{69f9f6c7-8e4f-11e1-a46f-005056bc0037}\"/>
<Volume DiskNumbers="1" SubwidIdx="4" DisplayName="g:\" UniqueID="\\?\Volume{a2f72c19-d096-11e5-a54e-005056bc0037}\"/>
<Volume DiskNumbers="0" SubwidIdx="5" DisplayName="\\?\volume{6e1e483d-8e40-11e1-a235-806e6f6e6963}\" UniqueID="\\?\Volume{6e1e483d-8e40-11e1-a235-806e6f6e6963}\"/>
</VolumeMappings>

We can clearly see that -

Disks 3,4,5,6 make up Logical volume E:
Disks 8,9 make up Logical volume I:

partitiontables.xml will provide you with the disk sizes

Example - 

-<PhysicalDisk NumPartitions="4" DiskSize_bytes="274872407040" PartioningScheme="MBR" MBRSignature="1720029347" DiskType="Fixed" DiskNumber="8" DiskSize_Gbytes="255" SectorSize_bytes="512">
-<PartitionList>
<Partition Size_bytes="274876826112" Start_bytes="32256" partStyle="MBR" SerialNumber_dec="0" SerialNumber_hex="0" PartitionNumber="0" Size_Gbytes="255" Type="Alternate Linux swap" Bootable="false"/>
<Partition Size_bytes="0" Start_bytes="0" partStyle="MBR" SerialNumber_dec="0" SerialNumber_hex="0" PartitionNumber="1" Size_Gbytes="0" Type="Empty" Bootable="false"/>
<Partition Size_bytes="0" Start_bytes="0" partStyle="MBR" SerialNumber_dec="0" SerialNumber_hex="0" PartitionNumber="2" Size_Gbytes="0" Type="Empty" Bootable="false"/>
<Partition Size_bytes="0" Start_bytes="0" partStyle="MBR" SerialNumber_dec="0" SerialNumber_hex="0" PartitionNumber="3" Size_Gbytes="0" Type="Empty" Bootable="false"/>
</PartitionList>
</PhysicalDisk>

-<PhysicalDisk NumPartitions="4" DiskSize_bytes="274872407040" PartioningScheme="MBR" MBRSignature="1720029346" DiskType="Fixed" DiskNumber="9" DiskSize_Gbytes="255" SectorSize_bytes="512">
-<PartitionList>
<Partition Size_bytes="274876826112" Start_bytes="32256" partStyle="MBR" SerialNumber_dec="0" SerialNumber_hex="0" PartitionNumber="0" Size_Gbytes="255" Type="Alternate Linux swap" Bootable="false"/>
<Partition Size_bytes="0" Start_bytes="0" partStyle="MBR" SerialNumber_dec="0" SerialNumber_hex="0" PartitionNumber="1" Size_Gbytes="0" Type="Empty" Bootable="false"/>
<Partition Size_bytes="0" Start_bytes="0" partStyle="MBR" SerialNumber_dec="0" SerialNumber_hex="0" PartitionNumber="2" Size_Gbytes="0" Type="Empty" Bootable="false"/>
<Partition Size_bytes="0" Start_bytes="0" partStyle="MBR" SerialNumber_dec="0" SerialNumber_hex="0" PartitionNumber="3" Size_Gbytes="0" Type="Empty" Bootable="false"/>

In the above scenario, Disks 8 and 9 together make up Volume I: and from the partitiontables.xml file you know the total size of I: will be 510GB. While creating the skeleton VM you will create a 510 GB drive.

Once you create the exact size and number of drives required, Avamar will perform a restore without any hiccups. 

Problem solved !

Thursday, March 15, 2018

VMware Stack Upgrade

I’m working on a plan to upgrade our existing VMware Stack and wanted to write a detailed post about all components involved and the order of upgrade.

Current State –

·        Primary and Recovery site with XtremIO Arrays on both ends with physical RecoverPoint appliances for array based replication.
·        vCenter Servers on both sites (with embedded Platform Services Controller) running on Windows Server 2012 R2 with an external SQL Database.
·         ESXi 6.0.0, 3825889
·         Site Recovery Manager (SRM) 6.1.1.13825
·         Storage Replication Adapter (SRA) 2.2.0.3
·         XtremIO (XIOS) 4.0.15-24, XMS 4.2.1
·         RecoverPoint (RPA) 4.4.1
·         Avamar 7.3

Future State –
·         vCenter Server Appliance (VCSA) 6.5 U1f
·         ESXi 6.5, 7388607
·         SRM 6.5.1, 6014840
·         SRA 2.2.0.3
·         XIOS 6.0.1, XMS 6.0.1
·         RecoverPoint (RPA) 5.1
·         Avamar 7.5

 There are numerous inter-dependencies to get to the future state.

·         Avamar 7.3 is not compatible with vCenter 6.5
·         RPA 4.4.1 is not compatible with ESXi 6.5
·         Upgrading SRM from 6.0.x to 6.5 is not supported. You have to upgrade to 6.1.x before you upgrade to 6.5 (in my case that’s not required since already running on 6.1.1.x)
·         Any vCenter upgrade will break SRM until both sides are on the same level. I have Array replication active in case of a disaster while upgrading SRM.

Prerequisites –

·         Backup of vCenter Database on primary and recovery site.
·         Backup of SRM vPostgres Database on primary and recovery sit. (Explained in detail below)
·         Primary and Recovery Site Platform Services Controller and vCenter server instances must be running.

Order of Upgrade –

·         Upgrade Avamar to 7.5
·         RPA 4.4.1 is not compatible with ESXi 6.5 hence upgrade that to RPA 5.1
·         Upgrade vCenter Server to VCSA 6.5 GA at primary site.
·         Upgrade SRM to 6.5 at primary site. Note: SRM cannot be upgraded from 6.1.1 to 6.5.1
·         Upgrade SRA at primary site – Not required since running on latest
·         vCenter Server to VCSA 6.5 GA at recovery site.
·         Upgrade SRM to 6.5 at recovery site.
·         Upgrade SRA at recovery site – Not required since running on latest.
·         Upgrade vCenter from 6.5 GA to 6.5U1g at primary site.
·         Upgrade SRM from 6.5 to 6.5.1 at primary site.
·         Upgrade vCenter Server to VCSA 6.5U1g at recovery site.
·         Upgrade SRM from 6.5 to 6.5.1 at recovery site.
·         Verify connection between SRM. Verify Protection groups and recovery plans are valid.
·         Upgrade ESXi to 6.5, 7388607 at recovery site.
·         Upgrade ESXi to 6.5, 7388607 at primary site.
·         Upgrade virtual hardware and then VMtools on Virtual Machines – Can be scheduled during the next available outage window.
·         Upgrade XIOS and XMS to 6.0.1

Backup & Restore (if required) the SRM Embedded vPostgres Database -

1)      Log into the system on which you installed Site Recovery Manager Server.
2)      Stop the Site Recovery Manager service.
3)      Navigate to the folder that contains the vPostgres commands.
4)      If you installed Site Recovery Manager Server in the default location, you find the vPostgres commands in C:\Program Files\VMware\VMware vCenter Site Recovery Manager Embedded Database\bin.
5)      Create a backup of the embedded vPostgres database by using the pg_dump command.
pg_dump -Fc --host 127.0.0.1 --port port_number --username=db_username srm_db > srm_backup_name. To create a backup you need the admin password. We did not have the Admin password documented. Here is a link on how to reset the Admin password - http://virtuallycurious.blogspot.com/2018/06/the-case-of-forgotten-site-recovery.html
You set the port number, username, and password for the embedded vPostgres database when you installed Site Recovery Manager. The default port number is 5678. The database name is srm_db and cannot be changed.
6)      Start the Site Recovery Manager service.
7)      Restore (if things go south) by using the pg_restore command
pg_restore -Fc --host 127.0.0.1 --port port_number --username=db_username --dbname=srm_db srm_backup_name

References –

·         VMware Product Interoperability Matrices -http://partnerweb.vmware.com/comp_guide2/sim/interop_matrix.php
·         Update sequence for vSphere 6.5 and its compatible VMware products (2147289) - https://kb.vmware.com/s/article/2147289
·         Backup and Restore the embedded vPostgres Database - https://docs.vmware.com/en/Site-Recovery-Manager/6.5/srm-install-config-6-5.pdf
·        EMC Recoverpoint SRA compatibility Matrix - https://www.vmware.com/resources/compatibility/detail.php?deviceCategory=sra&productid=39129
·        Compatibility Matrix for SRM 6.5 - https://www.vmware.com/support/srm/srm-compat-matrix-6-5.html